How to Fix a Leak Around a Chimney
Chimney leaks are a common source of water intrusion in homes, often leading to stains on ceilings and walls, musty odors, and even structural deterioration if left unaddressed. While the causes can vary, a significant number of leaks originate from compromised flashing or degraded waterproofing around the chimney base. This guide provides a systematic approach to identifying and repairing these vulnerable areas, with attention to material selection and step-by-step execution. By following these process-oriented instructions, homeowners can address many chimney leaks effectively, though professional assessment is recommended for complex roof geometries or significant damage.
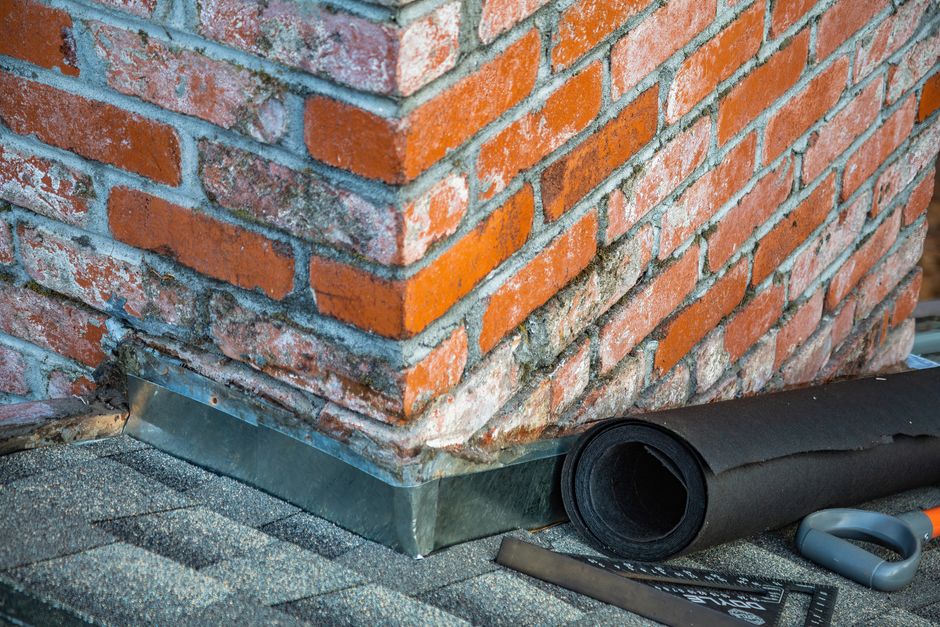
Understanding the anatomy of a chimney-roof intersection is crucial. The flashing—typically made of metal—is designed to divert water away from the joint, while counter-flashing embeds into the masonry to create a watertight seal. Over time, flashing can corrode, pull away, or develop gaps due to thermal expansion and contraction. Additionally, the porous nature of brick and mortar can allow moisture penetration if not properly sealed. This guide covers both flashing repair and the application of waterproofing products, with clear guidance on choosing appropriate materials and executing each step safely.
Assessing the Leak and Preparing the Work Area
Before any repair work begins, a thorough assessment is essential to pinpoint the source of the leak. Start by inspecting the roof from the ground with binoculars or from a ladder, looking for visible gaps, cracks, or lifted sections of flashing. Inside the home, examine the attic or ceiling around the chimney for water stains, which can indicate the general entry point. Mark any suspicious areas with chalk for closer inspection.
Once you have identified the likely trouble spots, prepare the work area. Weather conditions are a critical factor: you will need a dry, mild day, as most sealants and coatings require specific temperatures for proper curing, usually above 50°F. If the roof is wet or damp, flashings may be slippery, and sealants will not adhere properly. Clear any debris such as leaves, twigs, or moss from around the chimney and flashings using a stiff brush or a leaf blower. For safety, use a sturdy ladder and consider a harness if the roof slope is steep. If the chimney is tall, set up scaffolding or use a safety rope, and always have a helper nearby.
Choosing the Right Materials for Flashing Repair and Waterproofing
Selecting appropriate materials is vital for a durable repair. For flashing repair, you will need a high-quality exterior-grade sealant. Silicone-based sealants are flexible and excellent for metal-to-masonry or metal-to-shingle joints, but they are not paintable. Polyurethane and butyl rubber sealants offer strong adhesion and can be painted, making them versatile choices. For larger gaps that require a backing rod, use a closed-cell polyethylene foam rod to fill the void before applying sealant—this reduces the amount of sealant needed and prevents three-sided adhesion, which can cause cracking.
For waterproofing the chimney masonry, choose a breathable, water-repellent sealant specifically designed for masonry. These products allow moisture trapped in the brick to escape while preventing liquid water from penetrating. Silane-siloxane-based formulas are popular because they penetrate deep into the brick and do not alter the appearance. Avoid acrylic or film-forming sealers that can trap moisture and lead to spalling. If you are replacing any flashing sections, ensure the new metal matches the existing type—copper, aluminum, or galvanized steel—to prevent galvanic corrosion. Read all product labels to confirm compatibility and coverage rates.
Repairing Flashing with Sealant and Patching
Start by cleaning the flashing surfaces thoroughly. Use a wire brush to remove rust, old sealant, and debris. Wipe the area with a solvent-based cleaner and allow it to dry completely. This step is critical for adhesion; any residue can compromise the seal.
If the flashing is intact but has gaps or lifted edges, apply sealant carefully. Insert a backing rod into any large gaps, then apply a bead of sealant over the seam, using a caulk gun for even application. Smooth the bead with a putty knife or a wet finger to ensure full contact and eliminate air pockets. Pay special attention to the corners and edges where the flashing meets the masonry.
For sections of flashing that are corroded or severely damaged, you may need to patch or replace them. Cut a piece of compatible flashing material to overlap the damaged area by at least 4 inches on each side. Clean the overlapped area and apply a generous layer of sealant before pressing the patch in place. Secure the patch with roofing nails or screws, and then cover the fasteners and all edges with more sealant. Although this is a temporary fix, it can extend the life of the flashing until a more permanent replacement is undertaken.
Flashings are the primary defense against water intrusion at the chimney, but their effectiveness depends on proper installation and regular maintenance. A small gap can allow a significant amount of water to enter when driven by wind.
Applying Waterproofing to Chimney Masonry
After addressing the flashing, turn your attention to the brick and mortar. Even with perfect flashing, water can seep through porous masonry. Waterproofing the entire chimney structure from the roofline up is a proactive step to prevent moisture-related deterioration.
Choose a day with minimal humidity and no rain expected for at least 24 to 48 hours. Similar to the flashing repair, ensure the chimney surface is clean and dry. Use a masonry cleaner or a mixture of water and a mild detergent to scrub the surface, then rinse thoroughly. Allow it to dry completely, as sealants will not penetrate damp masonry.
Before applying the waterproofer, protect adjacent surfaces such as shingles and windows with plastic sheeting and painter’s tape. Use a pump sprayer or a brush to apply the masonry waterproofer evenly, starting from the bottom and working upward to avoid drips and streaks. Apply a generous coat, ensuring full coverage, and allow it to penetrate for the time specified on the product label. In most cases, two coats are recommended, especially on brick that is particularly porous or in areas with heavy rainfall.
Pay close attention to the mortar joints, which are often the weakest point. The waterproofer should be applied to both the brick faces and the joints. After the final coat, allow the solution to dry and cure according to the manufacturer’s instructions. This may take up to 48 hours, during which the surface will be water-repellent but still breathable.
Final Inspection and Preventive Maintenance
Once the sealant and waterproofer have cured, conduct a final inspection. Look for any missed spots, air bubbles in the sealant, or areas where water might still find a path. It is often helpful to spray the repaired area with a garden hose to simulate rain, checking the interior from the attic or ceiling for any signs of moisture. This simple test can reveal issues that might not be visible during a visual inspection.
If you discover any remaining leaks, you may need to reassess the flashing installation or consider more extensive repairs, such as re-flashing or installing a chimney cricket. These tasks are often best left to professional roofing contractors with specialized skills.
Preventive maintenance is key to avoiding future leaks. Schedule an annual inspection of your roof and chimney, especially after severe weather. Keep shrubbery and trees trimmed away to prevent debris accumulation, and ensure that gutters near the chimney are clean and functioning properly. Over time, sealants and waterproofing may wear out, so be prepared to reapply them every few years depending on the product and your climate.
While this guide covers the essential steps for sealing flashings and applying waterproofing, the longevity of the repair depends on the quality of materials, thoroughness of surface preparation, and adherence to manufacturer guidelines.
By following these methodical steps, you can effectively address many chimney leaks and protect your home from water damage. Each stage—from assessment to material selection to application—requires patience and attention to detail. For homeowners who are comfortable working on roofs, this is a manageable DIY project. However, if you have any doubts about your ability to safely perform these tasks, or if the roof structure is complex, consulting a professional is always a prudent choice. RoofCraft Solutions and similar companies can provide expert assessment and ensure that the repair is done safely and effectively.